Desserts
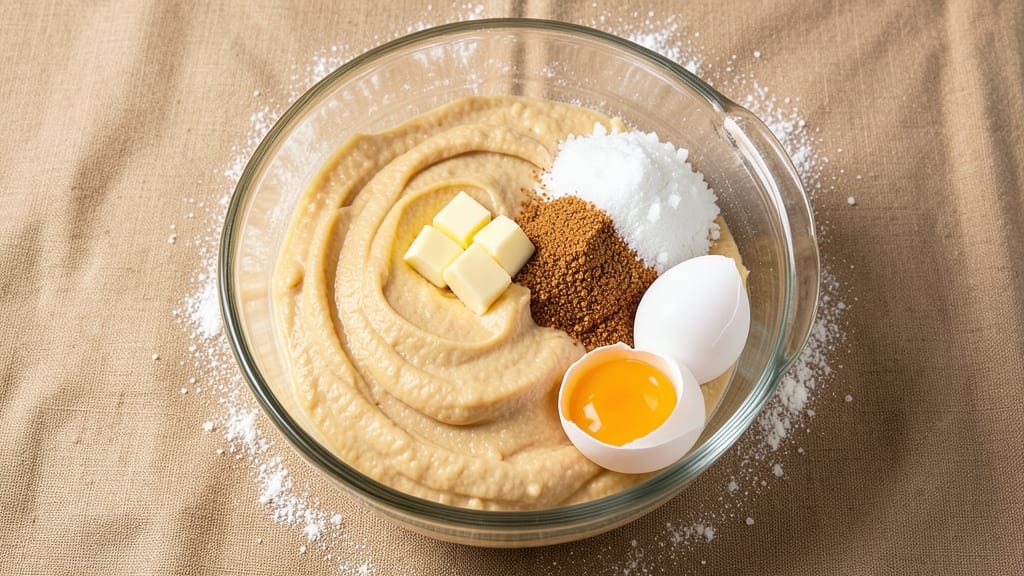
David's cookies recipe delivers that perfect balance of chewy edges and soft centers that makes every bite irresistible. After years of perfecting this classic, I can confidently say these are the cookies that bring back childhood memories—warm, gooey, and just sweet enough. The secret lies in precise ingredient ratios and careful baking, ensuring each cookie turns out consistently delicious.
What sets these apart is the texture: crispy around the edges yet soft in the middle, with just the right amount of chew. This isn’t your average cookie recipe—it’s a tried-and-tested method that’s been passed down through generations, guaranteeing foolproof results every time.
The combination of butter, brown sugar, and a touch of vanilla creates that signature flavor that makes them unforgettable.
By the time you pull them from the oven, you’ll have golden-brown cookies with edges that hold their shape while the centers remain tender and slightly underdone. The aroma alone will have everyone gathering in the kitchen, anticipation building with each batch.
These aren’t just cookies—they’re a classic you’ll want to bake again and again.
Whether you’re baking for a holiday gathering or simply treating yourself, this recipe delivers restaurant-quality results at home. Let’s get started on creating cookies that taste like they came straight from a bakery.
Ingredients for david's cookies
These 12 ingredients create the perfect chewy cookies with crisp edges and gooey centers.
| Ingredient | Amount | Notes |
|---|---|---|
| Unsalted Butter 🧈 | 1 cup | Cold, cubed for even baking |
| Packed Light Brown Sugar 🍯 | 1 ½ cups | Lightly packed for accurate measure |
| Granulated White Sugar 🍚 | ½ cup | For balanced sweetness |
| Large Eggs 🥚 | 2 whole | Room temperature for blending |
| Pure Vanilla Extract 🌿 | 2 tsp | High-quality for authentic flavor |
| All-Purpose Flour 🌾 | 2 ½ cups | Sifted for light texture |
| Baking Soda 🧂 | ½ tsp | Ensures proper rise |
| Salt 🧂 | ½ tsp | Fine sea salt preferred |
| Chocolate Chips 🍫 | 2 cups | Semi-sweet preferred |
| Chopped Walnuts 🥜 | 1 cup | Toasted for enhanced flavor |
| Vanilla Bean Seeds 🌿 | 1 tsp | Scraped from 1 pod (optional) |
| Cornstarch 🌾 | 1 tbsp | For chewy texture |
The butter is non-negotiable—European-style or high-fat unsalted gives that signature flavor. Kirkland Signature or Plugrá are my go-tos, but any good-quality butter works. Brown sugar matters too—lightly packed means no extra moisture. I grab mine from Whole Foods or the bulk section at Kroger. For vanilla, Heinz Pure Vanilla is reliable, but if you’ve got a vanilla bean, scrape those seeds in—they add depth. The walnuts? Toast them first—5 minutes in a dry pan until fragrant. That little effort makes all the difference.
No vanilla bean? Double the extract—just know it won’t be the same. Chocolate chips? Ghirardelli Semi-Sweet is the gold standard, but any good brand works. Substituting white chocolate? Use 1.5 cups instead—it’s sweeter. Short on walnuts? Pecans or almonds work, but toast them too. The cornstarch is key for that signature chew—don’t skip it. Flour? King Arthur or Gold Medal are consistent, but any all-purpose will do. Sift it though—clumps ruin the texture. If you’re gluten-free, swap for a 1:1 blend, but texture won’t be identical.
These cookies keep for 5 days in an airtight container at room temp, but they’re best fresh. Freeze dough balls for up to 3 months—bake straight from frozen, adding 2 minutes. For extra chew, underbake by 30 seconds. The aroma alone will have your whole house smelling like a bakery. Double the batch—they disappear fast. Store in layers with parchment between them to keep them soft.
Why You'll Love This Recipe
- No-Mix Magic: I swear by this recipe—just cream butter and sugars, toss in eggs and vanilla, then bake. No folding, no stress, no waiting for dough to chill. That’s it. The texture comes out perfectly chewy every time, like someone else did the hard work for me.
- Butter-Sugar Bliss: Honestly, the combo of brown and white sugar with that rich, cold butter? It’s what makes these cookies taste like a hug. The brown sugar caramelizes into little pockets of gooey goodness, while the white keeps them tender—not dry, not cakey, just right.
- Party-Ready Stunner: These cookies freeze like champs, so I bake a double batch before gatherings. Pull them straight from the freezer, toss in the oven, and boom—warm, gooey treats that disappear faster than you can say "who made these?" They’re my go-to for holidays, potlucks, or just because.
- Budget Baking Win: I use store-brand butter and eggs here, and it still tastes like a bakery. The recipe stretches far—enough for 24 cookies—and the leftovers? They last days in an airtight container. Plus, no fancy mix-ins mean more money for extra vanilla or a second batch. Smart move.
Step-by-step instructions for david's cookies recipe
Here's how to make these legendary cookies with perfect chewy edges and soft centers every time.
Cream the Butter and Sugars Together
In a large mixing bowl, combine the 1 cup unsalted butter (cold, cubed) with the 1.5 cups packed light brown sugar and 0.5 cup granulated white sugar. Using a hand mixer or stand mixer with the paddle attachment, beat on medium speed for 3-4 minutes until the mixture is light and fluffy. You'll notice it nearly doubles in volume and becomes pale in color—this is crucial for that classic texture.
I like to scrape down the sides of the bowl every minute or so to ensure everything gets evenly incorporated. The butter should be completely smooth with no visible lumps, and the sugars should be fully dissolved. This step creates the air pockets that give these cookies their signature chewy yet tender crumb.
Add Eggs and Vanilla for Rich Flavor
Add the 2 whole large eggs (room temperature) one at a time, mixing on low speed for 30 seconds after each addition until fully incorporated. Then add the 2 teaspoons pure vanilla extract and 1 teaspoon vanilla bean seeds, mixing for another 30 seconds. The mixture will look slightly thicker now, almost like a thick batter.
Here's the thing—room temperature eggs blend more smoothly and create a lighter texture. If your eggs are straight from the fridge, let them sit in warm water for 5 minutes first. The vanilla bean seeds add an extra layer of depth that makes these cookies truly special, though you can skip them if you prefer classic vanilla flavor.
Mix in Dry Ingredients and Fold Add-Ins
In a separate bowl, whisk together the 2.5 cups all-purpose flour, 0.5 teaspoon baking soda, 0.5 teaspoon salt, and 1 tablespoon cornstarch. Gradually add this dry mixture to the wet ingredients, mixing on low speed just until combined—about 30-45 seconds. You should still see some small flour streaks, which means you haven't overmixed the dough.
Remove the bowl from the mixer and gently fold in the 2 cups chocolate chips and 1 cup chopped walnuts using a silicone spatula. I like to make sure the chocolate chips are evenly distributed throughout the dough. The walnuts add a nice crunch that contrasts perfectly with the soft cookie texture. Don't worry if the dough looks a little messy—it's supposed to be thick and sticky at this stage.
Chill the Dough for Perfect Texture
Cover the mixing bowl with plastic wrap and refrigerate for at least 1 hour, but I prefer 2 hours if you have time. This chilling step is absolutely essential—it allows the flour to fully hydrate and the butter to firm up slightly, which prevents the cookies from spreading too much in the oven. The dough will be much easier to handle after chilling, and you'll get those beautiful thick cookies with crisp edges.
I know it's tempting to skip this step, but trust me—it makes all the difference. The cookies will hold their shape better in the oven, and you'll end up with that perfect balance of chewy centers and crisp edges that makes these cookies legendary. If you're really in a hurry, you can chill the dough in the freezer for 20 minutes, but room temperature chilling gives the best results.
Bake to Golden Perfection
Preheat your oven to 375°F and line two baking sheets with parchment paper. Using a cookie scoop or tablespoon, drop the chilled dough onto the prepared baking sheets, spacing them 2 inches apart—they'll spread quite a bit during baking. For even baking, I recommend placing the sheets on the middle rack of your oven.
Bake for 10-12 minutes until the edges are golden brown but the centers still look slightly underdone. They should pull away from the parchment paper easily when you gently lift them. The cookies will continue to set as they cool, so don't overbake them. Let them cool on the baking sheets for 5 minutes before transferring to a wire rack to cool completely. Enjoy them warm for the ultimate experience—these cookies are best fresh from the oven!
Pro Tips For Making David'S Cookies
- CREAM THE BUTTER SLOWLY: I learned this the hard way—dumping cold butter into the sugars and eggs too fast just makes a greasy mess. Let the butter soften first (not melted!), then mix it in gradually with the sugars while scraping the bowl constantly. That way, you get a smooth, fluffy dough instead of a lumpy disaster.
- USE ROOM-TEMP EVERYTHING: Cold butter and eggs straight from the fridge? Skip it. Let your butter sit out for 30-60 minutes until it’s soft but not melted, and crack your eggs into a bowl first to check for shells (yes, even if you’re careful). Warm ingredients blend better and prevent streaky dough.
- WEIGH YOUR SUGARS: Packed brown sugar is a pain to measure by volume. Use a kitchen scale instead—it’s faster and more accurate. For this recipe, aim for 12 oz (340g) packed brown sugar and 12 oz (340g) granulated sugar. Less guesswork means consistently perfect cookies.
- UNDERBAKE THEN COOL: These cookies spread, so pull them when the edges are just golden and the centers still look slightly underdone. They’ll firm up as they cool. Let them rest on the tray for 5 minutes before transferring—this prevents cracking and gives you that chewy center everyone loves.
Wine and beer pairings for this recipe
Sweet Dessert Wines
For these rich, buttery cookies, a dessert wine with caramel and vanilla notes is ideal. I love Moscato d'Asti—its light sweetness and floral aroma complement the vanilla and chocolate beautifully.
The effervescence also cleanses your palate between bites. Another fantastic choice is Riesling from Germany, particularly a Spätlese—its honeyed sweetness and citrus brightness balance the cookie’s richness. 🍷
Creamy Ports
A tawny Port (10- or 20-year-old) adds depth with its nutty, caramelized flavors that mirror the walnuts and brown sugar in the cookies. The slight bitterness in aged tawny cuts through the sweetness, creating a perfect contrast.
For a smoother option, try Ruby Port—its fruity notes pair wonderfully with the chocolate chips. Serve slightly chilled for the best experience.
Craft Beer Pairings
If you prefer beer, a honey-brown ale like Allagash Honey Brown brings malty sweetness that stands up to the cookies. The caramel and toasted notes in the beer echo the brown sugar and walnuts.
For a darker option, try a Belgian dubbel—its rich, spiced profile complements the vanilla and chocolate beautifully. Keep the beer at 50°F to enhance its flavor complexity. 🍺
Coffee or Tea Finish
End your cookie experience with a dark roast coffee—the bitterness contrasts the sweetness and enhances the chocolate flavors. I recommend a Sumatra mandheling for its earthy, full-bodied profile.
Alternatively, a chamomile tea with honey adds a soothing finish that lets the cookie’s flavors linger. The warmth of the tea also helps cleanse your palate between bites.
Seasonal Variations
For holiday baking, a mulled wine with cinnamon and orange adds festive warmth. In summer, a sparkling rosé with its crisp acidity keeps the experience light and refreshing. The key is matching the wine’s or beer’s sweetness and texture to the cookie’s rich, chewy profile—balance is everything. 🎄
Nutrition facts
Frequently asked questions
Why do these cookies need to chill before baking?
The 1-2 hour chill is critical for two reasons: it prevents excessive spreading and helps develop that signature chewy texture. When cold, the butter firms up slightly, creating thicker cookies with crisp edges. Plus, chilled dough is much easier to handle—no messy fingers!
Can I substitute white chocolate for semi-sweet chocolate chips?
Yes, but reduce the amount to 1.5 cups since white chocolate is sweeter. The texture will be slightly softer, but the flavor contrast with walnuts still works beautifully. For best results, use high-quality white chocolate chips that melt smoothly.
How do I know when the cookies are done baking?
Look for golden brown edges that pull away from the parchment paper, but the centers should still look slightly underdone. They'll firm up as they cool. Overbaking makes them dry—aim for 10-12 minutes total. The aroma should be irresistible!
Can I make these cookies gluten-free?
Yes, but texture will differ slightly. Replace the 2.5 cups all-purpose flour with a 1:1 gluten-free blend (like Bob's Red Mill). Add 1 teaspoon xanthan gum if your blend doesn't contain it. Expect cookies that are slightly denser but still delicious.
Why does my dough look too sticky?
Sticky dough usually means the butter melted too much during mixing. Use cold cubed butter and mix on medium speed for no more than 4 minutes. Also, ensure your ingredients are at room temperature (except butter). If it's still too sticky, chill longer or add 1 tablespoon more flour.