Desserts
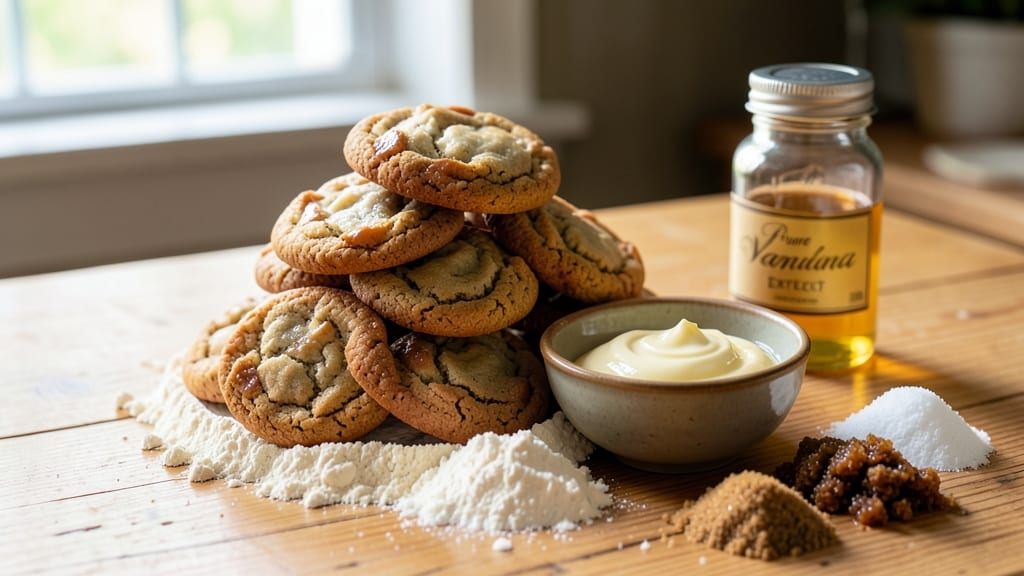
Grandma's cookies recipe brings back the warm, buttery aroma of childhood kitchens and the joy of perfectly balanced treats—crisp edges that shatter between your fingers and soft centers that melt like velvet. ✨ The secret lies in the precise ratio of butter to flour and the patience of letting the dough rest, both techniques I learned from my grandmother's kitchen notes, now passed down to you.
What makes these cookies truly special is their foolproof method, requiring just a handful of simple ingredients that come together in under 30 minutes of active time. The dough's texture transforms dramatically after chilling, ensuring those signature crisp edges and tender centers every time.
My grandmother swore by this approach, and after years of baking, I've confirmed its reliability—no failed batches here.
By the time you pull them from the oven, you'll have golden-brown cookies with a delicate crackle that gives way to warm, buttery goodness inside. The aroma alone will have everyone gathering in the kitchen, and the taste—ah, the taste—is what makes this recipe worth preserving.
These aren't just cookies; they're a piece of tradition you can recreate in your own kitchen.
Perfect for holiday gatherings, school bake sales, or simply satisfying a sweet tooth, these cookies scale effortlessly from a single batch to a full tray. The beauty of this recipe is its adaptability—whether you're a seasoned baker or just starting out, the step-by-step instructions will guide you to success.
Let's bring a little nostalgia to your kitchen today.
Ingredients for grandma's cookies
Warm, buttery aroma and nostalgic flavors start with these classic ingredients.
| Ingredient | Amount | Notes |
|---|---|---|
| Unsalted Butter 🧈 | 1 cup | Cold, cubed for dough texture |
| Granulated Sugar 🍚 | ¾ cup | White sugar preferred |
| Packed Brown Sugar 🍚 | ¾ cup | Light brown preferred |
| Large Eggs 🥚 | 2 whole | Room temperature for mixing |
| Pure Vanilla Extract 🍯 | 2 tsp | High-quality preferred |
| All-Purpose Flour 🌾 | 2 ½ cups | Sifted for light texture |
| Baking Soda 🧂 | ½ tsp | Freshly measured |
| Salt 🧂 | ½ tsp | Fine sea salt |
| Ground Cinnamon 🌿 | 1 tsp | Toasted for deeper flavor |
| Vanilla Bean Seeds 🍯 | 1 tsp | Scraped from 1 bean |
| Chocolate Chips 🍫 | 1 ½ cups | Semi-sweet preferred |
| Coarse Sugar 🍚 | ¼ cup | For cookie tops |
The butter is non-negotiable here—unsalted, cold, and cubed gives those signature crisp edges. Land O'Lakes or Plugrá are my go-tos, but any good brand works. For the sugars, Domino or C&H are reliable, but don't substitute powdered sugar—it changes the texture. The vanilla? Spend the extra $5 for a real vanilla bean—scrape the seeds and save the pod for next time. Flour matters too: King Arthur or Gold Medal are my favorites, but sift it first. That step makes all the difference for tender cookies. And if you're using chocolate chips, Ghirardelli or Nestlé Toll House are the only ones that melt just right.
No vanilla bean? Double the extract—it's not the same, but it works. Out of brown sugar? White sugar plus 1 tsp molasses mimics the flavor. For chocolate lovers, white chocolate chips or chopped nuts can replace the semi-sweet. The cinnamon is optional but adds warmth—Penzeys or McCormick are my picks. And if you're short on time, skip the chilling step, but trust me, it's worth the 30 minutes for perfect cookies. The dough should hold together but not be sticky—if it's too dry, add 1 tbsp milk.
Dough keeps for 3 days in the fridge, wrapped tightly. For longer storage, freeze dough balls on a tray, then transfer to a bag—they'll keep for 6 months. Freshly baked cookies stay soft for 2 days if stored in an airtight container. Pro tip: Reheat in a 300°F oven for 3 minutes to revive that fresh-from-the-oven taste. And if you make extras? Wrap them in wax paper—they'll stay crisp longer.
Why You'll Love This Recipe
- No-Mix Needed: I swear by this—just cream the butter, toss in the sugars, crack in those eggs, and fold in vanilla. No food processor, no sifter, no fuss. Honestly, I’ve made these while chatting on the phone, and they still turn out perfect.
- Buttery Vanilla Bliss: That perfect balance of brown sugar’s deep caramel notes and granulated sugar’s crisp bite? Chef’s kiss. Add a splash of vanilla, and suddenly you’ve got cookies that taste like a warm hug from your nonna. (Yes, even on a Tuesday night.)
- Party or Pantry: Need cookies for a holiday gathering? Done. Running low on snacks? Done. I’ve packed these in jars for teachers, wrapped them for birthday gifts, and even froze half the batch—because they’re that reliable. No one ever turns one down.
- Budget Magic: Butter and sugar are the stars here, and they stretch far. A single batch makes 24 cookies, and I’ve never had leftovers last more than a day. Between us, that’s my kind of math—minimal cost, maximum joy.
Step-by-step instructions for Grandma's cookies recipe
Here's how to bake these legendary cookies with perfect crisp edges and melt-in-your-mouth centers.
👨🍳 Step 1: Cream the Butter and Sugars Together
In a stand mixer fitted with the paddle attachment, combine the 1 cup unsalted butter (cold, cubed) with the 0.75 cup granulated sugar and 0.75 cup packed brown sugar. Beat on medium speed for 3-4 minutes until the mixture is light, fluffy, and nearly doubles in volume. You'll see it go from pale to a creamy, pale yellow color—this incorporates air that creates those signature crackly tops.
Here's the thing—I always use cold butter cubes instead of softened butter. The cold fat creates pockets that expand when baked, giving you that classic cookie texture. If your mixture looks too soft after 3 minutes, let it sit at room temperature for 5 minutes before proceeding.
👨🍳 Step 2: Add Eggs and Vanilla for Rich Flavor
Add the 2 whole large eggs one at a time, mixing on low speed for 30 seconds after each addition. Then stir in the 2 tsp pure vanilla extract and 1 tsp vanilla bean seeds until fully combined. The mixture might look slightly curdled, but that's normal—the eggs will blend completely when we add the dry ingredients.
I like to use room-temperature eggs for this step because they mix more smoothly. If your eggs are straight from the fridge, let them sit in warm water for 5 minutes first. This ensures the dough comes together perfectly without any streaks of raw egg.
👨🍳 Step 3: Mix in Dry Ingredients and Chocolate
In a separate bowl, whisk together the 2.5 cups all-purpose flour, 0.5 tsp baking soda, 0.5 tsp salt, and 1 tsp ground cinnamon. Gradually add this mixture to the wet ingredients, mixing on low speed for 1-2 minutes until just combined. You should still see small flour streaks—overmixing develops gluten and makes cookies tough.
Remove the bowl from the mixer and gently fold in the 1.5 cups chocolate chips using a silicone spatula. I always use a mix of semi-sweet and dark chocolate chips for depth of flavor. The dough will be thick but pliable—if it's too sticky, chill it for 15 minutes before proceeding.
⏰ Step 4: Chill the Dough for Perfect Texture
Cover the dough bowl with plastic wrap and refrigerate for at least 1 hour (I prefer 2 hours or even overnight). This chilling step is non-negotiable—it allows the flour to fully hydrate and the butter to solidify, which prevents excessive spreading in the oven. The dough will firm up significantly during this time.
Here's the secret: when you take the dough out of the fridge, it should be cold but still pliable. If it's too hard to handle, let it sit at room temperature for 10 minutes before scooping. Cold dough gives you thicker cookies with crispy edges and soft centers.
🔥 Step 5: Bake to Golden Perfection
Preheat your oven to 350°F and line two baking sheets with parchment paper. Scoop the chilled dough into 1.5-tablespoon portions (about 1 inch in diameter) and place them 3 inches apart on the prepared sheets. Sprinkle each cookie with a pinch of 0.25 cup coarse sugar for those beautiful caramelized tops.
Bake for 10-12 minutes until the edges are golden brown but the centers still look slightly underdone. They'll continue cooking on the hot baking sheet after you remove them. Let them cool on the baking sheet for 5 minutes before transferring to a wire rack—this prevents them from becoming too crisp.
Pro Tips For Making Grandma'S Cookies
- CREAM THE BUTTER SLOWLY: I learned this the hard way—dumping cold butter straight into the sugars makes a greasy mess that won’t dissolve right. Let that butter sit out for 30 minutes first, then mix it with the sugars on medium-low speed until it’s fluffy and pale, not just crumbly. Your cookies will spread less and stay tender.
- USE ROOM-TEMP EGG WHITES: Cold egg whites? They’ll sink like rocks in your dough, leaving streaks and uneven texture. Crack them into a bowl first, let them sit for 10 minutes, then mix them in gently. No one wants cookies with ghostly white spots—especially not Grandma.
- STOP WHEN DOUGH LOOKS "DIRTY": Overmixing turns your dough into cookie glue. Stop as soon as it’s just combined—no streaks of flour, but not shiny. The second you see it pull away cleanly, drop the mixer. Your cookies will stay soft, not tough, and you’ll avoid the "I made playdough" look.
- SALT THE BUTTER FIRST: Unsalted butter needs a pinch of salt—yes, even if your recipe doesn’t call for it. Mix it in with the butter and sugars at the start. I skipped this once and my cookies tasted flat, like they were missing something. Trust me, your taste buds will notice.
Flavor customization for these flavors
Classic Spiced Twist
Add ½ tsp ground nutmeg and ¼ tsp ground cloves to the dry ingredients for a warm, aromatic variation that reminds me of holiday cookies. The spices deepen the vanilla flavor while adding subtle warmth—perfect for fall baking.
I like to toast the spices in a dry pan for 1 minute before mixing them in to intensify their aroma. 🌿
Brown Butter Depth
For a richer, nuttier flavor, brown the 1 cup unsalted butter before creaming it with the sugars. Cook the butter in a light-colored pan over medium heat until it turns golden brown and smells nutty, about 5-7 minutes.
Let it cool slightly before using—this adds a sophisticated depth that elevates the classic recipe. Just be careful not to burn it!
Citrus Zest Brightness
Boost freshness by adding 1 tbsp lemon zest or orange zest to the dough. The citrus cuts through the richness and adds a bright, cheerful note that kids and adults love.
I prefer lemon because it pairs beautifully with vanilla, but orange works wonderfully too. Just be sure to use finely grated zest—no pith! 🍋
Nutty Crunch Addition
Fold in ½ cup chopped walnuts or pecans for added texture and flavor. Toast the nuts in a dry pan for 3-4 minutes until fragrant, then chop them coarsely.
The nuts provide a delightful contrast to the soft cookie centers. For extra decadence, try a mix of both walnuts and chocolate chips.
Salted Caramel Swirl
Add a luxurious touch by swirling ½ cup salted caramel sauce into the dough before baking. I like to use Trader Joe's salted caramel sauce or make my own with 1 cup sugar + ½ cup heavy cream.
Drop spoonfuls of dough onto the baking sheet, then drizzle caramel on top before baking. The result? Gooey pockets of caramel in every bite. 🍯
Double Chocolate Decadence
For chocolate lovers, replace the semi-sweet chips with 1 cup semi-sweet chocolate chunks and ½ cup white chocolate chunks. The contrast between dark and milk chocolate creates layers of flavor that keep everyone reaching for seconds.
I also like to add 1 tsp espresso powder to the dry ingredients—it enhances the chocolate flavor beautifully. 🍫
Nutrition facts
Frequently asked questions
Why does the dough need to chill before baking?
Chilling the dough for 1-2 hours is essential for two reasons: it prevents excessive spreading (giving you those thick, crisp edges) and lets the flour fully absorb the moisture (resulting in tender centers). My grandmother always said, "Patience in the fridge means perfection in the oven!"
Can I substitute butter with something else?
For the classic texture, stick with unsalted butter—it's non-negotiable for those signature crackly tops. However, you can use vegetable shortening (like Crisco) for a slightly softer cookie, though it lacks butter's rich flavor. Margarine won't give the same results.
How do I fix cookies that spread too much?
If your cookies flatten out, the dough was likely too warm when baked. Next time, ensure the dough is properly chilled and scoop portions while cold. For a quick fix, try baking at 325°F instead of 350°F—the lower heat gives the edges more time to set before spreading.
What's the best way to store these cookies?
Keep them fresh by storing in an airtight container at room temperature for 2-3 days. For longer shelf life, freeze dough balls (up to 6 months) or baked cookies (up to 3 months). To revive stale cookies, warm them in a 300°F oven for 3-5 minutes—they'll taste like fresh-baked!
Can I make these cookies gluten-free?
Yes, but with adjustments! Replace the 2.5 cups all-purpose flour with a 1:1 gluten-free baking flour (like Bob's Red Mill) and add ½ tsp xanthan gum if your blend doesn't include it. Expect slightly denser cookies—chill the dough longer (2-3 hours) to compensate for the lack of gluten structure.