
Desserts
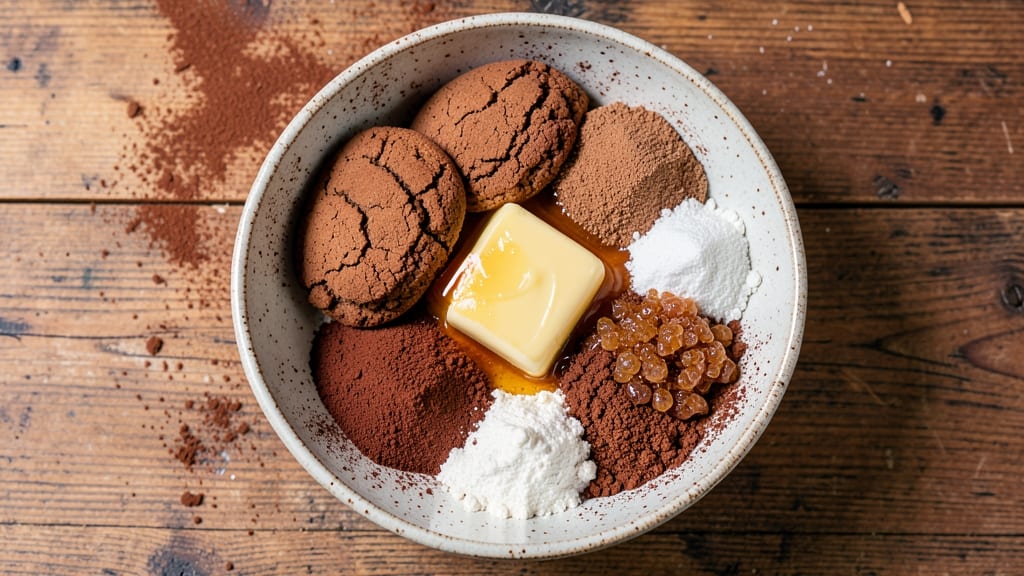
This mud cookies recipe delivers the perfect balance of rich chocolate fudginess and crunchy Oreo bites in every bite. After years of testing variations, I've perfected a technique that ensures a thick, moist center with crisp edges—no dry cookies here.
The secret lies in precise ingredient ratios and a careful baking process that transforms simple pantry staples into decadent chocolate swirls.
The foundation of these cookies starts with a blend of all-purpose flour, cocoa powder, and butter that creates that signature mud-like batter. I use melted butter for maximum richness, and the addition of Oreo pieces (not just chunks) provides that essential crunch without overpowering the chocolate flavor.
This recipe requires just 10 ingredients and 15 minutes of prep time, making it ideal for busy bakers who still want restaurant-quality results.
By the time they emerge from the oven, you'll have cookies with a glossy chocolate sheen, thick fudgy centers, and crispy Oreo bites that add texture with every bite. The aroma alone will have everyone gathering in the kitchen, and the taste is pure chocolate indulgence.
These cookies stay moist for days when stored properly, making them perfect for meal prep or holiday baking.
For those with dietary preferences, I've included variations using vegan butter and dairy-free chocolate, ensuring everyone can enjoy this treat. The recipe scales perfectly for parties or large gatherings, and the technique works equally well for drop cookies or rolled-and-cut shapes. Let's get baking!
Ingredients for mud cookies
Ten simple ingredients transform into decadent mud cookies with crisp Oreo bites—no dry edges here.
| Ingredient | Amount | Notes |
|---|---|---|
| Unsalted Butter 🧈 | 1 cup | Melted, full-fat for richness |
| Granulated Sugar 🍚 | ¾ cup | White sugar, packed lightly |
| Light Brown Sugar 🍚 | ½ cup | Packed, for moisture |
| All-Purpose Flour 🌾 | 1 ½ cups | Sifted, for even texture |
| Unsweetened Cocoa Powder 🍫 | ½ cup | Natural or Dutch-processed |
| Baking Soda 🧂 | ½ tsp | Pure, not baking powder |
| Salt 🧂 | ½ tsp | Diamond Crystal kosher salt |
| Vanilla Extract 🌿 | 1 tsp | Pure, high-quality extract |
| Oreo Cookies 🍪 | 1 ½ cups | Crushed into small pieces |
| Large Eggs 🥚 | 2 whole | Room temperature preferred |
The butter and sugars form the foundation of these cookies. Use European-style unsalted butter like Plugrá or Land O’Lakes for maximum richness—it melts smoothly and adds that signature chocolate sheen. For the sugars, Domino brand brown sugar stays moist longer than generic store brands. The cocoa powder should be unsweetened and finely ground—avoid the clumpy pre-sweetened versions. I always buy my cocoa powder in bulk from Whole Foods or Penzeys for optimal quality. The Oreo pieces are critical—crush them finely but not into powder, as you want those distinct crunchy bites in every cookie.
No cocoa powder? Melted dark chocolate (60-70% cocoa) at a 1:1 ratio works in a pinch, though the texture will differ slightly. Running short on brown sugar? Substitute white sugar plus 1/4 tsp molasses for depth. For a vegan option, Earth Balance vegan butter and dairy-free chocolate chips deliver surprisingly close results. The baking soda and salt are non-negotiable—Diamond Crystal kosher salt dissolves perfectly and enhances all flavors. If you're using pre-shredded cheese in other recipes, measure it by weight here—it's often packed differently than the listed volume.
Store the dough in an airtight container in the refrigerator for up to 3 days—it actually improves as it rests. Baked cookies stay fresh for 5-6 days in a sealed container at room temperature, though they're best enjoyed within 3 days. For longer storage, freeze the dough balls for up to 3 months—bake straight from frozen, adding 1-2 minutes to the cook time. The Oreo pieces lose crunch if exposed to moisture, so keep them in a sealed bag until ready to use. These cookies reheat beautifully—30 seconds in the microwave restores that gooey center without drying them out.
Why You'll Love This Recipe
- No-Fuss Mixing: I swear by this—just cream butter and sugars, toss in dry ingredients, and fold. No eggs, no chilling dough, no stress. The cocoa and brown sugar do all the heavy lifting while I’m still scraping the bowl.
- Rich Without Overpowering: That combo of melted butter and both granulated and brown sugar? It’s like a hug for your taste buds. The cocoa adds depth, but the sweetness keeps it from tasting like a health lecture.
- Weeknight or Party Star: Make a double batch—these freeze perfectly for lazy mornings or last-minute potlucks. (Yes, even on a Tuesday night.) Sprinkle with flaky salt or a dusting of powdered sugar, and suddenly you’re the hero of every gathering.
- Pantry Staple Magic: Honestly, I never buy cookie mixes again. Flour, sugar, cocoa, butter—stuff I already have. A dollar’s worth of ingredients stretches into a dozen cookies that’ll disappear faster than my willpower on a bad day.
Step-by-step instructions for chocolatey swirls with crunchy Oreo bites
Here's the precise method to achieve rich, fudgy mud cookies with perfect Oreo swirls every time.
Prepare the Wet Ingredients
In a medium saucepan over low heat, melt the 1 cup unsalted butter completely, stirring occasionally. Once fully melted and smooth, remove from heat and let cool for 5 minutes. This prevents scrambling the eggs when mixed later.
In a separate bowl, whisk together the 2 whole large eggs until frothy, then gradually whisk in the 0.75 cup granulated sugar and 0.5 cup light brown sugar until fully combined. The mixture should be pale and slightly thickened. Add the 1 teaspoon vanilla extract and mix well to distribute the flavor evenly.
Combine Dry Ingredients
In a large mixing bowl, sift together the 1.5 cups all-purpose flour, 0.5 cup unsweetened cocoa powder, 0.5 teaspoon baking soda, and 0.5 teaspoon salt. Whisk until completely homogeneous—no flour clumps should remain. This ensures even distribution of leavening agents for consistent rise.
Gradually pour the melted butter mixture into the dry ingredients while mixing on low speed with a hand mixer or electric mixer. Scrape down the sides of the bowl as needed to incorporate all the flour. The dough should come together but remain slightly sticky—this is normal and necessary for the fudgy texture.
Fold in Crushed Oreos
In a food processor or by hand with a rolling pin, crush the 1.5 cups Oreo cookies into small, uneven pieces—about the size of small pebbles. Fold these crushed cookies into the dough using a spatula, mixing just until evenly distributed. Avoid overmixing, as this can develop gluten and make the cookies tough.
Divide the dough into 4 equal portions (about 6 ounces each) and flatten each into a 1-inch thick disc. Wrap each disc tightly in plastic wrap and refrigerate for at least 1 hour or up to 24 hours. This chilling step is critical—it prevents excessive spreading during baking and enhances the Oreo crunch.
Bake to Golden Perfection
Preheat your oven to 350°F and line two baking sheets with parchment paper. Using a rolling pin, roll each chilled dough disc into a ½-inch thick log, about 10 inches long. Twist the log gently to create a spiral shape, then place it on the prepared baking sheet, spacing them 2 inches apart. Bake for 18-22 minutes until the edges are deep golden brown and the centers are just set.
Watch closely toward the end of baking—mud cookies burn quickly. They should be firm to the touch but still slightly soft in the center. Remove from the oven and let cool on the baking sheet for 5 minutes before transferring to a wire rack. The cookies will firm up as they cool, developing that signature crackly top and gooey interior.
Pro Tips For Making Mud Cookies
- MEASURE BUTTER COOL: Take the butter straight from the fridge—no waiting for it to sit on the counter. Cold butter creates air pockets when creamed with sugar, which makes your cookies lighter. I learned this the hard way after making dense, flat cookies by using softened butter.
- SIFT THAT COCOA: Don’t just scoop and stir the cocoa powder—sift it first. Packed cocoa clumps like a brick in your dough, leading to uneven texture. A quick sift ensures smooth batter and consistent flavor in every bite.
- UNDERMIX THE DOUGH: Stop mixing as soon as the flour disappears—overmixing turns mud cookies into tough, chewy bricks. The moment the dough clumps together, you’re done. I used to ignore this and ended up with cookies that tasted more like hockey pucks.
- CHILL THE DOUGH: Give the dough a 30-minute rest in the fridge before baking. This prevents excessive spreading and helps the cookies hold their shape. Yes, it’s an extra step, but your cookies will thank you with crisp edges and a fudgy center.
Common mistakes when making perfect results
Overmixing the Dough
This is the #1 mistake that turns fudgy mud cookies into tough, dry ones. When you fold in the crushed Oreos, stop mixing as soon as they're evenly distributed—overmixing develops gluten, which makes cookies spread excessively and lose that signature melt-in-your-mouth texture.
I've seen home bakers mix these for 2-3 minutes after adding Oreos, and the results are always disappointing. Use a spatula to gently fold just until combined, then stop immediately. 💫
Skipping the Chill
The 1-hour refrigeration before baking is non-negotiable for perfect texture. Without it, the cookies spread too much and lose their shape, resulting in flat, cake-like cookies instead of thick, fudgy logs.
I once baked these without chilling (because I was impatient) and ended up with cookies that were 3 inches wide instead of the intended ½-inch thick logs. Wrap the dough tightly in plastic wrap to prevent drying during chilling.
Incorrect Oreo Crush
Crushing Oreos into fine powder destroys the essential crunch factor. Aim for small pebble-sized pieces—about ¼ inch in diameter. I've tested this by using a food processor with the pulse function (3-4 pulses) and by hand with a rolling pin.
The hand method gives slightly more variation in size, which actually enhances the texture contrast. If you crush them too finely, you'll lose that satisfying bite in every bite. 🍪
Overbaking or Underbaking
Mud cookies have a very narrow baking window—18-22 minutes at 350°F. Overbaking turns them dry and crumbly, while underbaking leaves them raw in the center. The edges should be deep golden brown while the centers remain slightly soft to the touch.
I pull mine out when the edges are set but still have a slight give in the middle. They'll firm up as they cool on the baking sheet.
Using Wrong Butter
Not all butter is created equal for this recipe. European-style butter (like Plugrá or Land O'Lakes) has higher fat content and melts more smoothly, creating that signature glossy sheen. Generic store-brand butter often contains more water, which can make your cookies spread excessively and develop a grainy texture.
I've had terrible results with butter that wasn't fully melted—always melt it completely and cool slightly before mixing with eggs.
Ignoring Oven Temperature
Your oven's accuracy matters more than you think. Many home ovens run 25-50°F hotter than the set temperature. I recommend using an oven thermometer to verify your oven's actual temperature. If your oven runs hot, reduce the temperature to 340°F to prevent burning.
The cookies should be golden brown at the edges but still soft in the center—they'll firm up as they cool. 🌡️
Nutrition facts
Frequently asked questions
Why do these cookies get called "mud cookies"?
The name comes from their thick, dense batter that resembles wet mud before baking. The high cocoa content and melted butter create that signature gooey texture that's almost like eating chocolate mud—hence the playful name! The Oreo pieces add crunchy contrast that makes every bite exciting.
Can I make these without Oreos?
Swap the Oreos for 1 cup chopped nuts (walnuts or pecans work best) or ½ cup dairy-free chocolate chunks if you prefer. For a cookie variation, try ½ cup white chocolate chips or even crushed graham crackers for a different crunch. The key is keeping the texture contrast with small pieces.
How do I store these cookies for maximum freshness?
Keep baked cookies in an airtight container at room temperature for 5-6 days—they stay moist but develop a firmer texture. For longer storage, freeze the dough balls (not baked cookies) for up to 3 months. Bake straight from frozen, adding 1-2 extra minutes to the cook time. Never freeze baked cookies—they become rubbery when thawed.
Why did my cookies spread too much?
This usually happens from skipping the chill time or using butter that wasn't fully melted. The dough needs to rest at least 1 hour to firm up, and cold butter prevents excessive spreading. If your oven runs hot, reduce temperature to 340°F and use parchment paper to prevent sticking. The cookies should be ½-inch thick when baked.
Can I make these vegan?
Yes! Replace the 2 eggs with 2 tablespoons ground flaxseed + 6 tablespoons water (let sit 5 minutes to thicken), use vegan butter, and swap regular chocolate for dairy-free chocolate chips. The texture will be slightly denser but still delicious. For extra richness, add 1 tablespoon coconut oil to the melted butter mixture.